


Losing weight from the belly is one of the most difficult of all the other parts of weight lose. Belly can really make you work hard on your exercising routine, and moreover, it can be difficult sometimes to deal with. So here are some really amazing as well as good yoga poses for belly weight loss that you can try at home and lose those stubborn fats from your stomach.
Yoga Poses For Belly Weight Loss
1Padahastasana or Standing Forward Bend
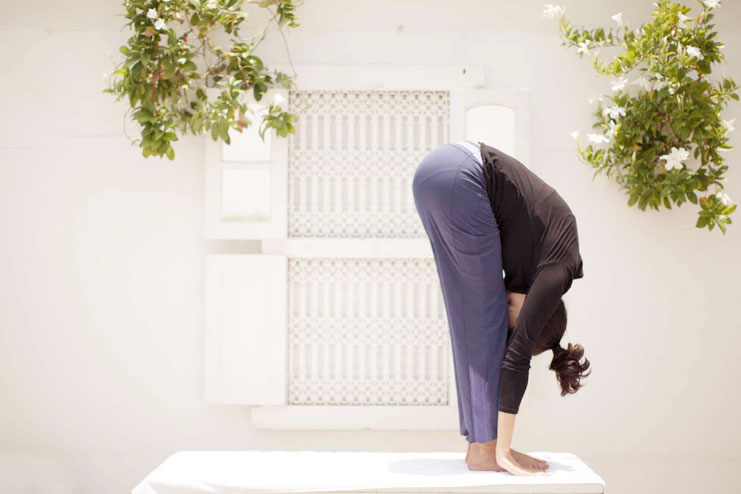
- First stand straight in a tadasana pose, with the hands on the side of the body while the feet resting, and the heels touching each other.
- Try to keep the spine erect.
- While inhaling, lift the hand up.
- As you exhale, try to slowly bend forward in a way that the body is parallel to the floor.
- While breathing, bend forward slowly as well as completely, with the body falling away from the hips.
- Slowly try to touch the floor, with the palms straight, and without bending the knees. Beginners can touch the toes or even just the ankles to start with, slowly working their way to the floor.
- Holding the breath, tuck the tummy in, and hold in this pose for 60 to 90 seconds.
- Exhale, and then leave your toes, lifting the body to come back to the tadasana pose.
- Try to repeat this asana at least ten times, with an interval of 10 seconds in between the two repetitions.
Surya Namaskar – Fat Burning Yoga Workout
Benefits
- It can help to improve the digestion, as the abdominal muscles are getting toned
- It can strengthen the wrist joints
- It can help relieving from the mental as well as physical exhaustion
2Paschimottanasana or Seated Forward Bend
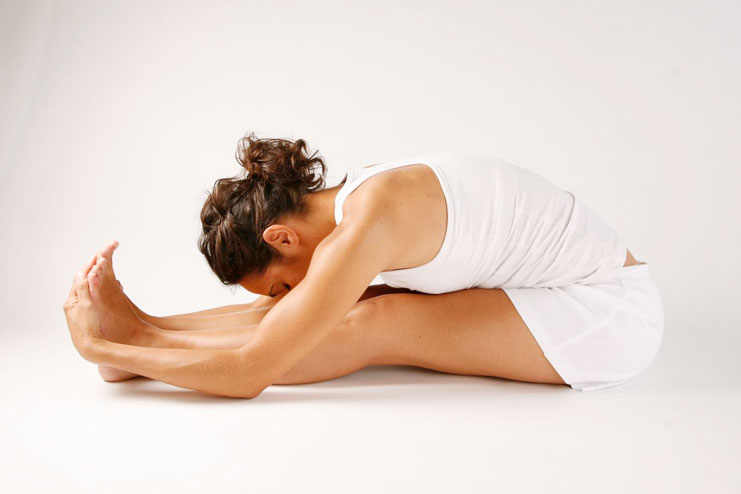
- First sit on the floor in sukahasana or padmasana.
- Keep the spine erect, and stretch the legs out.
- While inhaling, try to stretch the hands above the head. Your gaze must follow the hands. Try to stretch the spine to the maximum.
- While you exhale, slowly bend forward from the thighs. Bring the hands down and try to touch your toes. The head must rest on the knees. Beginners can also try touching the ankles or just the thighs as starter.
- Once when you have touched your toes, try to hold them and pull them backward until you experience a stretch on the hamstrings. Remember you don’t want to be harsh and harm yourself. Do this slowly as well as gently, you just need to feel the stretch.
- Then breathe in, and hold your tummy, try to be in that position for at least 60 to 90 seconds. Slowly, try to increase the time of holding the pose for up to five minutes, or more.
- Exhale, and bring the body up, relieving the toes from the fingers to come back in the sukhasana or padmasana pose.
- Repeat the asana for at least ten times, working up to 25 times or even more.
Benefits
- It can help to give relief from stress
- It can help into the reduction of fat in the abdomen
- It can also help to balance menstrual cycles
3Pavanamuktasana or Wind Relieving Pose

- Lie down on a supine position, which is, facing upward with the arms beside the body and feet stretched out, the heels touching each other.
- Now try to bend the knees.
- Take a deep breath, and while exhaling, bring the bent knees towards the chest, with your thighs applying the pressure onto the abdomen. Then hold the knees in the place by clasping the hands underneath your thighs.
- While breathing, try to lift the head, allowing the chin to touch the knees.
- Try to hold in this pose for 60 to 90 seconds, while deeply breathing.
- Then exhale slowly, and release the knees allowing the head to rest onto the floor. Bring the hands on either side of the body, and the palms facing to the ground.
- Then relax in shavasana.
- Try to repeat the asana seven to ten times and having a 15-second interval in-between the repetitions.
Benefits
- It can help strengthen the back and the abdominal muscles
- It can helps the digestion as well as the release of the gas
- It can tone the muscles in the legs and the arms
4Uttanpadasana or Raised Foot Pose
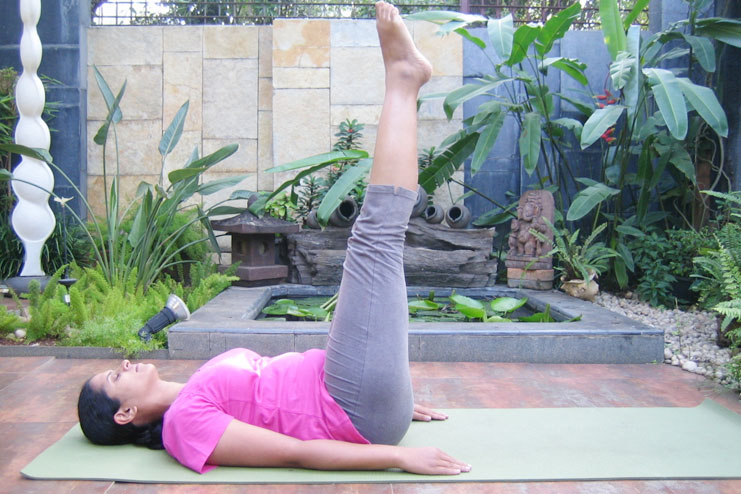
- First lie down on the mat with the back on the floor, and the legs stretched out, as well as the heels touching each other. Keep the hands on either side of the body, and the palms facing to the ground.
- While deeply breathing in and out, tilt the back bringing the head backward so that it can touch the floor.
- Try not to move the hands from the initial position. Then breathe normally.
- Try to stretch to the maximum level possible, without hurting the back.
- Then while inhaling, raise the legs from the floor, making it a 45-degree angle with the floor.
- Try to hold this pose for about 15 to 30 seconds, normally breathing.
- While exhaling, lift the legs so that it can make a 90-degree angle from the floor. Normally breathing, hold this pose for at least 30 seconds.
- Then gradually bring the legs back into the initial position, that is, the supine position.
- Try to repeat this asana ten times in the beginning, working up to 30 times gradually.
- Then relax for 15 seconds after each of the repetition.
Benefits
- It can help treating the stomach-related ailments like the acidity as well as constipation
- It can help cure the back pain
- It can help improve the functioning of the reproductive organs
- It can help on improving the blood circulation
5Marjariasana or Cow Cat Pose or Cat Pose
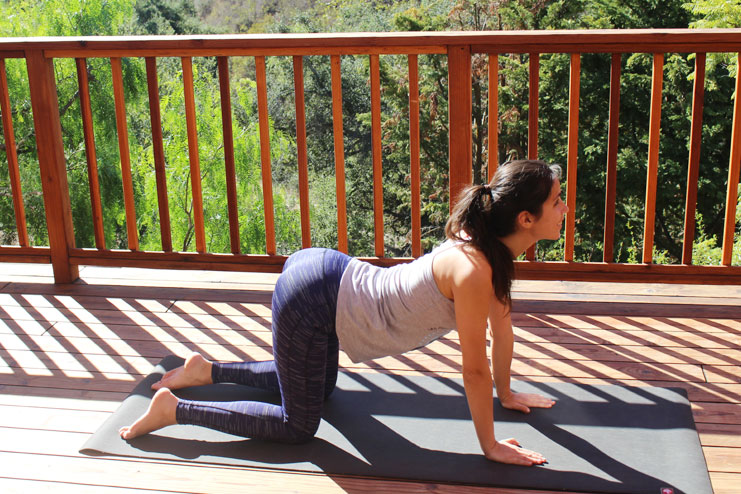
- First sit in a vajrasana pose.
- While normally breathing, rise from the pose, and allow the body to come parallel to the floor, in such a way that your body is resting on the knees and the palms.
- While the knees must be placed beneath the hips, the palms must be under the shoulders facing to the floor. Then keep the head straight. You can space out your knees slightly so that the weight is evenly spread out.
- While deeply inhaling, lift the head, pushing the back down, so that the body has a concave structure.
- Try to expand the abdominal region as much as possible so that it can suck the maximum amount of air.
- Holding the breath, maintain this posture for about 15 to 30 seconds.
- While exhaling, lower your head, and arching the back up. Try to keep the buttocks and the abdomen firm until experiencing the contraction. Your head must be between the hands.
- Breathing in and out, try to hold this pose for about 15 to 30 seconds, working for up to 60 to 90 seconds.
- Exhale and then slowly come back to the vajrasana and relax for 15 seconds.
- Try to repeat this asana ten times in the beginning, working up to 30 times.
- Then relax for about 15 seconds after each of the repetition.
Benefits
• It can help improve the sturdiness in the spinal column
• It can help correct the posture
• It can help to give relief to the tension in the lower back
Yoga Work Plan For Weight Loss


